超强记忆力训练法有用吗,使用 JavaScript 手把手教你如何卡片记忆游戏

我得到了一个编码练习,用任何语言制作一个记忆游戏。我决定这样的任务真的不需要任何像 React 或 jQuery 这样的库,所以我用普通的 JavaScript 完成了它。
GOALS 目标
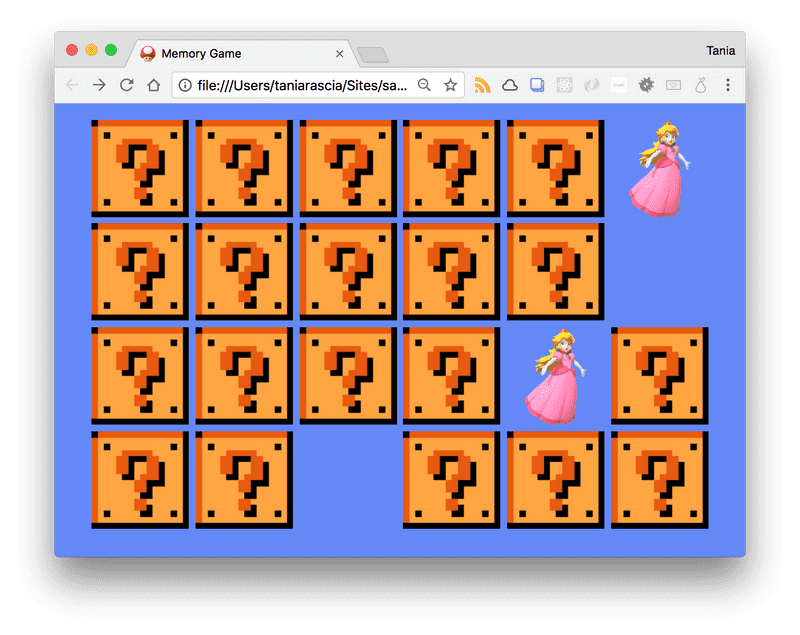
游戏的前提是有一个由24张面朝下的牌组成的网格。牌面由成对的火柴组成。单击卡片将翻转它们,显示价值。当选择两张牌时,如果匹配,两张牌都会消失。如果不是,则卡片将翻转回面朝下。每次刷新游戏时,游戏都应该不同。
单击下面的演示,了解我们将要创建的内容。
Planning 设计
在编写任何代码之前,我们需要了解从零到成品的实际步骤。一次构建整个游戏可能看起来有点不知所措,但是如果你把它分解成小任务,每个任务在完成之前看起来都是可以实现的。
Display 12 cards. 显示12 张卡片
Duplicate the cards to have 2 sets of 12. 每两张相同
Randomize the display of cards. 随机显示卡片
Add selected style for selected cards. 增加选中卡片样式
Only allow two cards to be selected at a time. 同时只显示 2张卡片
Determine if two selected cards are a match and hide them. 判断两张选中卡片是否相同
Reset guess count after 2. 选中2个后,复位
Add delay to selections. 增加选中后的延时效果
Show back of card initially and flip on select 初始显示卡片背面,选中后翻转卡片
Finished game! 完成游戏
现在,可能有一百万种方法可以创建这个游戏。这就是我们要做的方式。
Setup 配置
首先,让我们创建设置。我们将创建索引.html,它只是一个常规的HTML框架,放入JS和CSS。整个应用程序将包含在游戏div中,因此此文件根本不会更改。
index.html
<!DOCTYPE html><html lang="en"> <head> <meta charset="urf-8" /> <meta name="viewport" content="width=device-width, initial-scale=1.0" /> <meta http-equiv="X-UA-Compatible" content="ie=edge" /> <title>Memory Game</title> <link rel="stylesheet" href="css/style.css" /> </head> <body> <div id="game"></div> <script src="js/script.js"></script> </body></html>
我们将添加一些基本样式,这些样式刚好足以使应用有意义。这里没有框架或不必要的代码,甚至没有任何预处理器。这不是一个CSS教程,所以你应该已经知道这里发生了什么,但我只是用卡片创建一个flex网格。
每张卡都是 150x150,并且具有背景属性,因为我们将很快将卡图像添加为背景图像。当我们向代码中添加一些更复杂的功能(如卡片翻转)时,此CSS将被调整,但现在它很好。
style.css
*,
*::before,
*::after { box-sizing: border-box;
}body { margin: 20px 0; background: #6589f9;
}.grid { max-width: 960px; margin: 0 auto; display: flex; flex-wrap: wrap; justify-content: space-evenly;
}.card { margin: 5px; background-color: #6589f9; background-size: contain; background-repeat: no-repeat; background-position: center center; height: 150px; width: 150px;
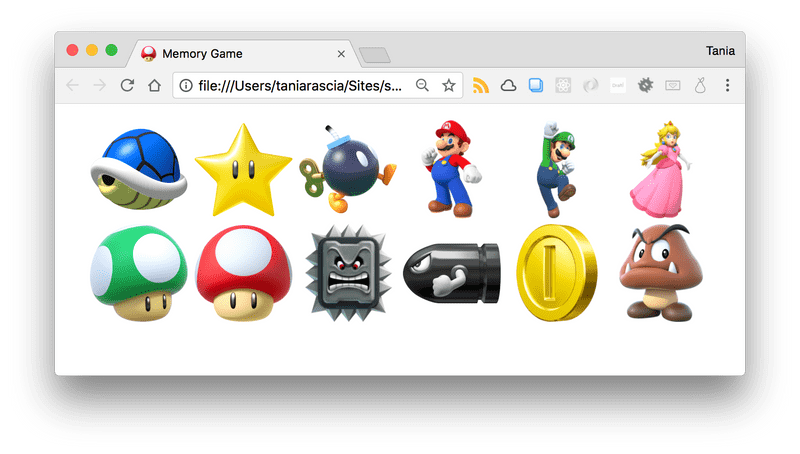
}Display 12 cards 显示12张卡片
第一步是显示 12 张卡片,每张卡片都有不同的值。为此,我将创建一个对象数组,并将其放入cardAlarey变量中。每个对象将包含一个名称和一个图像。
script.js
// Card dataconst cardsArray = [
  {
    name: 'shell',
    img: 'img/blueshell.png',
  },
  {
    name: 'star',
    img: 'img/star.png',
  },
  {
    name: 'bobomb',
    img: 'img/bobomb.png',
  },
  {
    name: 'mario',
    img: 'img/mario.png',
  },
  {
    name: 'luigi',
    img: 'img/luigi.png',
  },
  {
    name: 'peach',
    img: 'img/peach.png',
  },
  {
    name: '1up',
    img: 'img/1up.png',
  },
  {
    name: 'mushroom',
    img: 'img/mushroom.png',
  },
  {
    name: 'thwomp',
    img: 'img/thwomp.png',
  },
  {
    name: 'bulletbill',
    img: 'img/bulletbill.png',
  },
  {
    name: 'coin',
    img: 'img/coin.png',
  },
  {
    name: 'goomba',
    img: 'img/goomba.png',
  },
]
现在我们有12张卡,但是我们如何显示它们呢?首先,我们将抓住我所说的元素,该元素将是整个应用程序的根 - 具有游戏ID的div。我们将创建一个新的部分元素,为其提供网格类,并将其附加到游戏根 div 中的 DOM 中。
script.js
// Grab the div with an id of rootconst game = document.getElementById('game')// Create a section with a class of gridconst grid = document.createElement('section')
grid.setAttribute('class', 'grid')// Append the grid section to the game divgame.appendChild(grid)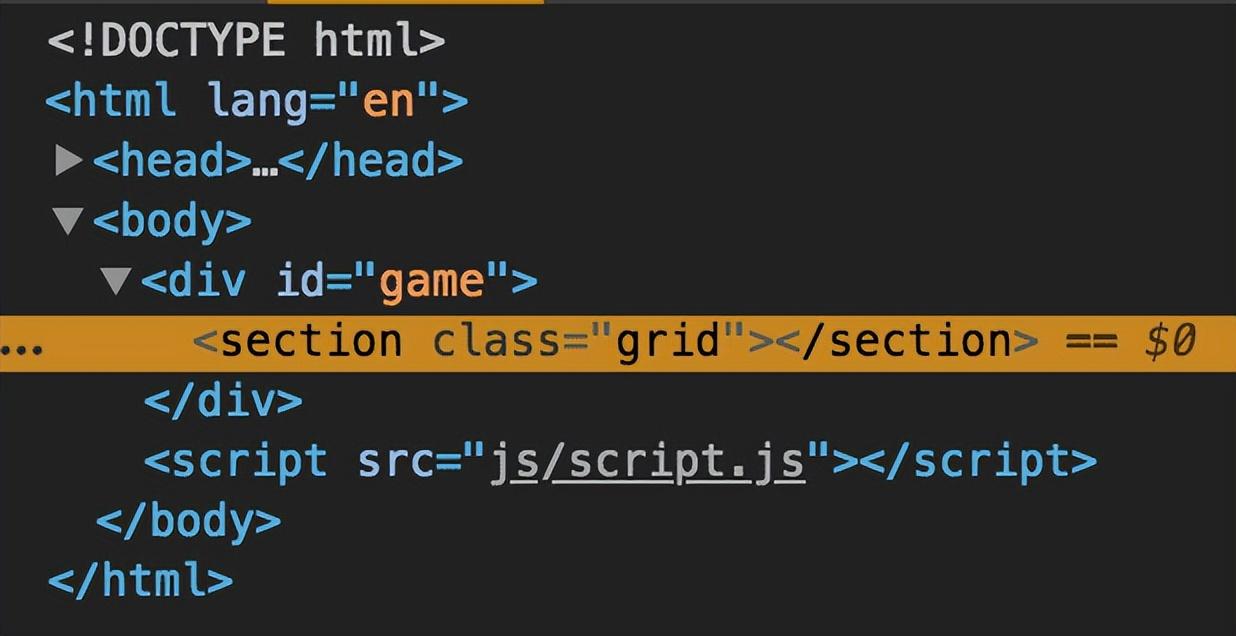
If none of this makes sense, please read The Introduction to the DOM article I wrote.
现在,我们希望将图像显示在前端。我们将使用 forEach() 遍历卡片阵列中的每个项目,为每个对象创建一个新的卡片 div,并设置该 div 的数据名称属性和背景图像样式属性。然后,我们将该 div 追加到网格中。这将总共给我们12个潜水员。
script.js
// For each item in the cardsArray array...cardsArray.forEach((item) => {  // Create a div  const card = document.createElement('div')  // Apply a card class to that div
  card.classList.add('card')  // Set the data-name attribute of the div to the cardsArray name
  card.dataset.name = item.name  // Apply the background image of the div to the cardsArray image
  card.style.backgroundImage = `url(${item.img})`  // Append the div to the grid section
  grid.appendChild(card)
})
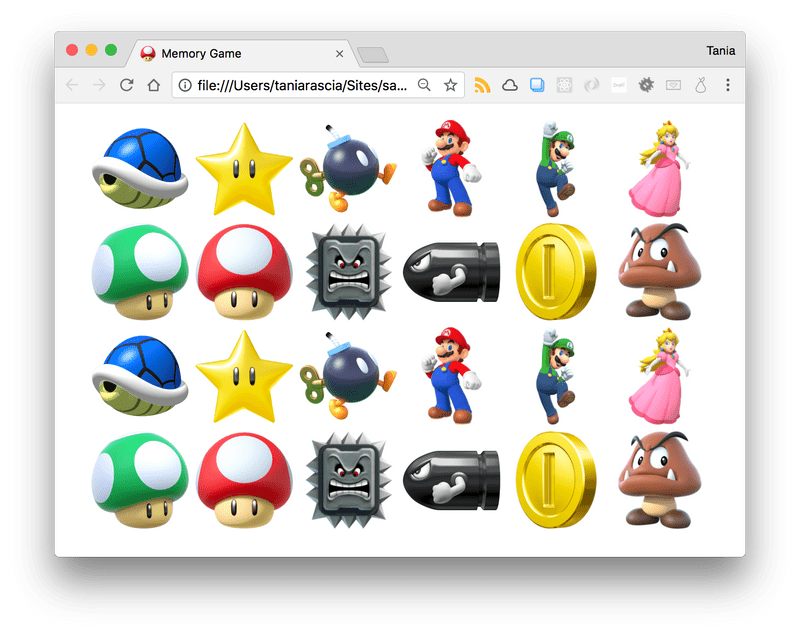
Duplicate the cards to have 2 sets of 12 卡片两两一组
第二步比第一步简单得多。现在,我们将复制卡片数组,然后循环访问该数组。首先,在数组下方,创建一个游戏网格变量,并使用 concat() 复制该数组。
script.js
// Duplicate array to create a match for each cardlet gameGrid = cardsArray.concat(cardsArray)
替换cardsArray 在 gameGrid 通过forEach() 循环.
script.js
// For each item in the gameGrid array...gameGrid.forEach(item => { // ...将显示如下效果
Randomize the display of cards 随机显示卡片
使用sort()和Math.random()随机排列数组。
script.js
// Randomize game grid on each load
gameGrid.sort(() => 0.5 - Math.random())
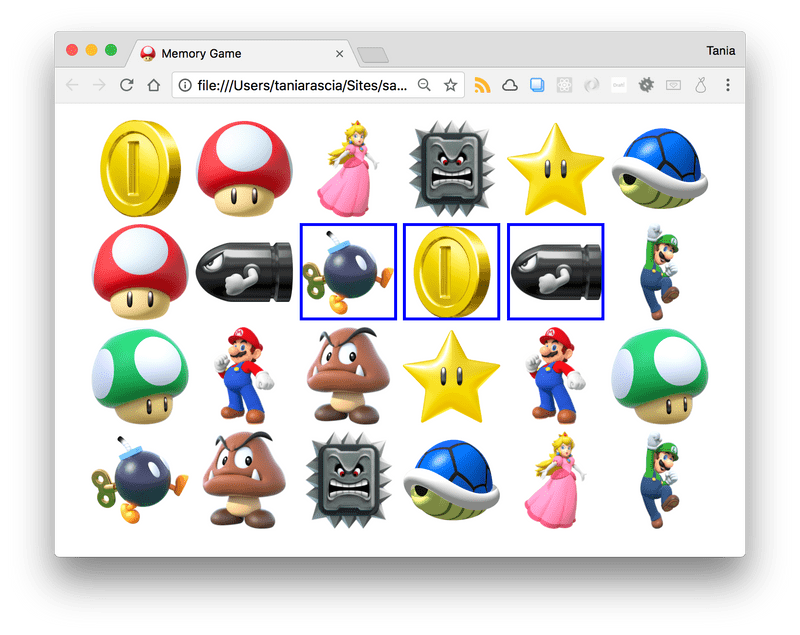
Add selected style for selected cards 添加选中样式
style.css
.selected {  border: 4px solid blue;
}
script.js
// Add event listener to gridgrid.addEventListener('click', function (event) {  // The event target is our clicked item  let clicked = event.target  // Do not allow the grid section itself to be selected; only select divs inside the grid  if (clicked.nodeName === 'SECTION') {    return
  }  // Add selected class
  clicked.classList.add('selected')
})
效果如下
Only allow two cards to be selected at a time 同时只能选中两个卡片
script.js
let count = 0
script.js
// ...if (count < 2) {  count++  // Add selected class  clicked.classList.add('selected')
}
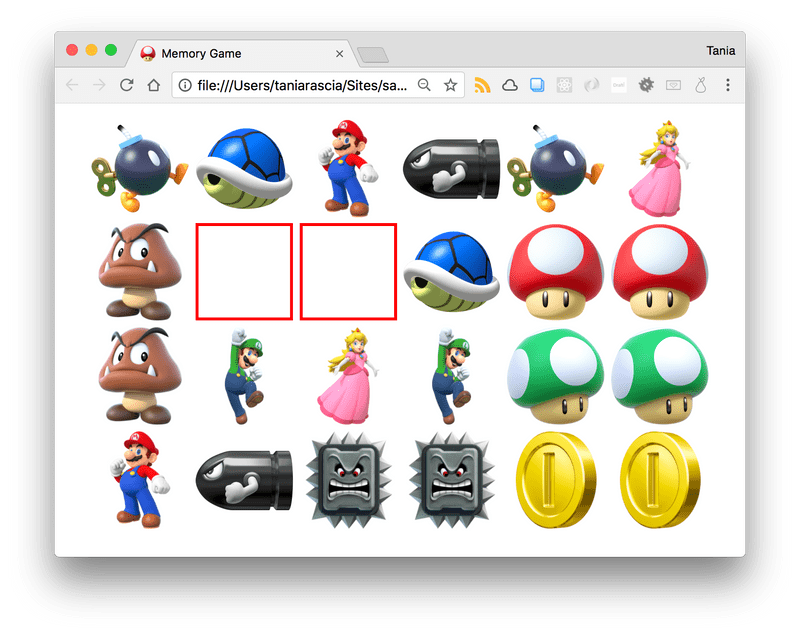
Determine if two selected cards are a match and hide them 判断两个选中的卡片是否相同,相同则两张卡片均消除
style.css
.match {  border: 4px solid red;  background-image: none !important;
}
script.js
let firstGuess = ''let secondGuess = ''let count = 0
cript.js
// Add match CSSconst match = () => {  var selected = document.querySelectorAll('.selected')
  selected.forEach((card) => {
    card.classList.add('match')
  })
}
监听click 事件
script.js
grid.addEventListener('click', function (event) {  //...  if (count < 2) {
    count++    if (count === 1) {      // Assign first guess
      firstGuess = clicked.dataset.name
      clicked.classList.add('selected')
    } else {      // Assign second guess
      secondGuess = clicked.dataset.name
      clicked.classList.add('selected')
    }    // If both guesses are not empty...    if (firstGuess !== '' && secondGuess !== '') {      // and the first guess matches the second match...      if (firstGuess === secondGuess) {        // run the match function
        match()
      }
    }
  }
})
相同后,消除效果如下:
现在这里有一个问题 - 你能猜到它是什么吗?如果我选择同一元素两次,它将认为它是匹配的,因为它们都具有相同的 data-name 属性。我不应该两次选择相同的元素,所以我们必须在继续之前解决这个问题。首先,我将添加一个上一个目标变量。
script.js
let previousTarget = null
script.js
if (firstGuess !== '' && secondGuess !== '') {    if (firstGuess === secondGuess) {
      match();
    }
  }  // Set previous target to clicked
  previousTarget = clicked;
}
script.js
if (clicked.nodeName === 'SECTION' || clicked === previousTarget) { return}现在,再次单击同一元素将被忽略。
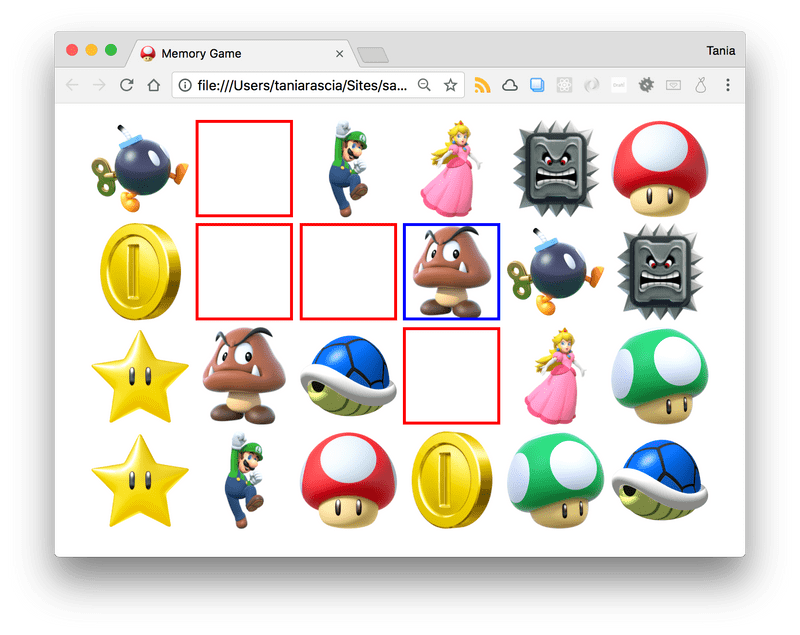
Reset guess count after 2 在 2 之后重置猜测计数
现在,我们只有两个猜测。如果它们是匹配项,则会显示匹配样式。如果不是,则将显示常规的选定样式。我们希望允许多种猜测。我们必须通过在两次猜测后重置猜测计数来执行此操作,无论它们是否匹配。
首先,我将创建一个函数来重置猜测。这会将所有计数和猜测设置回其原始值,并删除选定的 CSS。
script.js
const resetGuesses = () => {
  firstGuess = ''
  secondGuess = ''
  count = 0

  var selected = document.querySelectorAll('.selected')
  selected.forEach((card) => {
    card.classList.remove('selected')
  })
}
script.js
if (firstGuess === secondGuess) {  match();  resetGuesses();
} else {    resetGuesses();
  }
}
现在,您可以进行多个匹配。您会注意到,如果选择样式不匹配,它将立即消失,但这很好,因为我们没有设置任何延迟以允许其显示更长时间。
Add delay to selections 为选择添加延迟
现在,一切都立即发生。我们希望在进行选择后延迟,以便用户可以在再次隐藏卡片之前看到他们的选择。现在这并不重要,因为一切都是可见的,但是我们可以在将最终的风格触动放在卡片上之前处理它。
script.js
let delay = 1200
script.js
if (firstGuess === secondGuess) {  setTimeout(match, delay)  setTimeout(resetGuesses, delay)
} else {  setTimeout(resetGuesses, delay)
}
现在,我们可以在选择和匹配消失之前的1.2秒内看到它们。

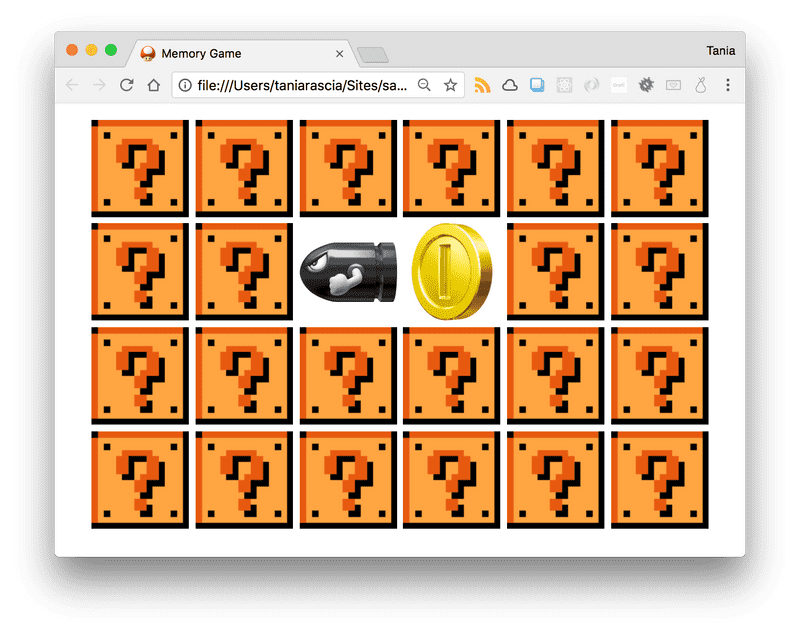
Show back of card initially and flip on select 最初显示卡片背面并翻转选择
当我第一次这样做时,我一直隐藏着卡片,这使得测试变得不必要地困难。这一次,我决定隐藏卡片作为最后一步之一,一旦所有功能都在那里。
游戏具有我们想要的所有功能,但不是样式。我们需要:
Hide the cards initially 最初隐藏卡片
Flip them over when selected 选择时翻转它们
Make matches disappear 让匹配消失
所有这些都是相辅相成的,并且需要对代码进行一些结构更改。我们必须添加更复杂的CSS来完成这项工作。
首先,我们的卡现在都由一个div组成。为了实现翻转,每个 div 需要由三个 div 组成,如下所示:
<div class="card"> <div class="front"></div> <div class="back"></div></div>
script.js
gameGrid.forEach((item) => {  // Create card element with the name dataset  const card = document.createElement('div')
  card.classList.add('card')
  card.dataset.name = item.name  // Create front of card  const front = document.createElement('div')
  front.classList.add('front')  // Create back of card, which contains  const back = document.createElement('div')
  back.classList.add('back')
  back.style.backgroundImage = `url(${item.img})`  // Append card to grid, and front and back to each card
  grid.appendChild(card)
  card.appendChild(front)
  card.appendChild(back)
})
script.js
if (count === 1) {
  firstGuess = clicked.parentNode.dataset.name  console.log(firstGuess)
  clicked.parentNode.classList.add('selected')
} else {
  secondGuess = clicked.parentNode.dataset.name  console.log(secondGuess)
  clicked.parentNode.classList.add('selected')
}
tyle.css
.card {  position: relative;  transition: all 0.4s linear;  transform-style: preserve-3d;  margin: 5px;
}.card,.back,.front {  height: 150px;  width: 150px;
}.back,.front {  position: absolute;  backface-visibility: hidden;
}
每张牌的正面(如果你像一副牌一样思考,技术上是背面,但我称之为正面,因为它是默认视图)将是一个问号框。
style.css
.front {  background: #fab942 url('../img/question.gif') no-repeat center center /
    contain;
}
背面将具有背景图像的所有属性以设置样式属性,并且它将针对翻转动画进行旋转。
style.css
.back {  transform: rotateY(180deg);  background-color: white;  background-size: contain;  background-repeat: no-repeat;  background-position: center center;
}
所选项目将被旋转,匹配的项目将变为白色,这将覆盖通过 JavaScript 应用的背景图像。
style.css
.selected {  transform: rotateY(180deg);
}.match .front {  background: white !important;
}
Finished game! 游戏完成!
你能发现当前游戏的任何问题吗?现在,我看到我可以翻转已经匹配的项目,所以我将在顶部的 return 语句中禁用它。
script.js
if (
  clicked.nodeName === 'SECTION' ||
  clicked === previousTarget ||
  clicked.parentNode.classList.contains('selected')
) {  return}
这是我能找到的最后一个问题!我添加了一个蓝色背景,以获得更像马里奥的风格,现在它完成了!您可以通过计算和显示失败的尝试次数或在完成后添加消息来进一步扩展此游戏,但我认为这已经足够好了。
Conclusion 总结
在本文中,我们学到了很多关于在创建应用程序之前对其进行规划,并将其分解为小步骤以使其易于实现。我们学习了如何使用普通的JavaScript在页面中插入和操作元素,这对任何只知道如何使用jQuery等库的人都很有帮助。我们做了一些有趣的事情来玩。享受!
play 地址:
https://taniarascia.github.io/memory/


1-100数字记忆编码图,有必要花钱学记忆法吗,快速记忆方法之编码实战操练


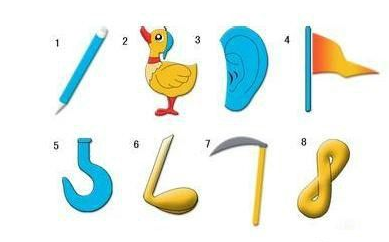
看到4的数字你会联想到什么,快速记忆数字的方法和技巧,快速记忆-抽象联想之数字记忆


1-100数字记忆编码图,1到20数字卡片图片,数字人文本熟读之美! 让数字人更美!#拍摄准备工作
精选推荐
- [记忆方法] 最有效的备考方法,法考如何备考,2021年高考备考:8种高效记忆方法
- [记忆方法] 考前快速大量记忆技巧,最有效的备考方法,考前冲刺:一消备考也要动脑筋,这样记忆方法大多数考生并不知道
- [记忆方法] 怎样快速记忆知识点且记得牢,考前快速大量记忆技巧,会计从业备考不放假,六大归纳记忆法带你飞!
- [记忆方法] 快速记忆方法的小窍门,怎样快速记忆知识点且记得牢,这些记忆方法让你学习、备考的效率大大提升!
- [精品记忆课] 记忆课程有没有效果,记忆力课程,“超强记忆”吸引家长买了课,没上几节校长就失联,41名家长能要回16万余元的培训费用吗?
- [精品记忆课] 最强大脑记忆训练法视频,记忆课程有没有效果,超强记忆系统课_第2节 底层逻辑篇 超强记忆系统课_第2节
- [古诗词记忆] 孩子记忆力差,背书困难怎么办,有什么快速背书的方法,有用的背书方法,快收藏码住吧~
- [记忆方法] 记忆的方法和技巧,记忆宫殿训练方法,技巧:熟记这些顺口溜,轻松记忆历史朝代知识
- [记忆方法] 历史朝代记忆口诀,记忆的方法和技巧,我国历史朝代顺序记忆口诀
- [古诗词记忆] 文科怎么背怎样才能记得住,文科背书怎么背得快又牢固,文科成绩难提高?你需要这12个方法

最有效的备考方法,法考如何备考,2021年高考备考:8种高效记忆方法

考前快速大量记忆技巧,最有效的备考方法,考前冲刺:一消备考也要动脑筋,这样记忆方法大多数考生并不知道